Using the brazoslink OpenVPN Service
Using the brazoslink OpenVPN Service
Standard VPN services such as PPTP, L2TP, and IPsec frequently encounter difficulties on certain networks that do not support those services, either due to deliberate filtering or inherent limitations of the network itself. OpenVPN is an open-source VPN solution that uses industry-standard SSL/TLS (Secure Sockets Layer/Transport Layer Security) protocols--the same stuff that's used by secure webservers. As such, OpenVPN does not require anything special of the local network--if you can connect to an https:// website, then you should be able to use OpenVPN, even if other types of VPN connections do not work.
OpenVPN currently runs on Linux, Windows 2000/XP and higher, OpenBSD, FreeBSD, NetBSD, Mac OS X, Solaris, and iOS (iPhone//iPad/iPod touch). An OpenVPN PocketPC port is under development. See http://www.openvpn.net for more information.
Step 1 - Get the software
Windows, Linux, *BSD, or Solaris: Point your web browser to https://openvpn.net/community-downloads/, download the latest stable version of OpenVPN, and install it on your system.
Mac OS X: For a free solution, point your web browser to http://tunnelblick.net, download the latest version of Tunnelblick, and install it on your system.
Mac OS X or Windows: For a $9 solution that is more feature-rich (and in our experience works better) than the free software, visit http://www.viscosityvpn.com.
iOS: Download the free OpenVPN Connect app from the iTunes App Store.
Android: Download the free OpenVPN Connect app from Google Play. For setup help, click here.
Step 2 - Email brazoslink support
Email brazoslink support (use the contact link at the bottom of this page), and request your OpenVPN configuration files. We will send you an email containing a password-protected zipped set of configuration files, and a second email containing the password to the zip archive. This step is necessary because each OpenVPN client requires a unique set of files to ensure security. An advantage to this is that you'll never have to enter a username/password to connect to the brazoslink OpenVPN service. If your computer is ever lost or stolen, please be sure to notify us, so we can disable its configuration on the server (we'll create a new set of configuration files for your new computer).
Step 3 - Install the configuration file(s)
Unzip the configuration files to your desktop (if you need an unzip utility, download the free PKZIP Reader). The files should be contained in a folder named openvpn.
Note: For the latest OpenVPN clients, the only file in the unzipped folder that you should need is the "brazoslink.ovpn" file. You should be able to open or import that file into the OpenVPN client, and be done.
Whenever you connect to the VPN, you should immediately open a web browser and visit http://waynak.net to check your connection. If you rely on your VPN connection for personal security, consider making waynak.net your home page.
First, follow the basic installation instructions.
Windows 10: Click here to view an installation & configuration walk-through video. It may be all you need!
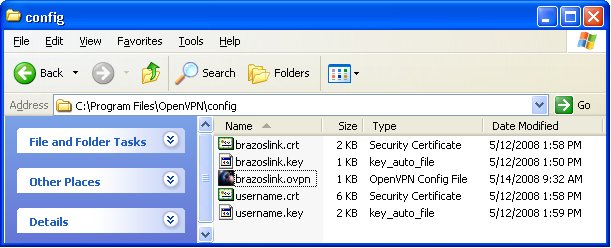
Older Windows: Go to Start > All Programs > OpenVPN > Shortcuts > OpenVPN configuration file directory (this will open a folder named config):

Drag all the files from the openvpn folder on your desktop into the config folder:
Run OpenVPN GUI: ![]()
Note for Windows Vista/7/8/9/10+ users: You must force Windows to run the OpenVPN GUI as Administrator; otherwise, the VPN will be able to connect but will not be able to modify the network settings to send traffic across the VPN connection. Right-click on the OpenVPN GUI icon in your Start menu, and select Properties:
Click the Compatibility tab, enable the "Run as Administrator" option, and click OK:
The OpenVPN GUI puts an OpenVPN control icon in the taskbar:
![]()
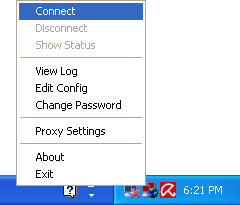
Right-clicking on the OpenVPN control in the taskbar should display a pop-up menu. Select Connect:
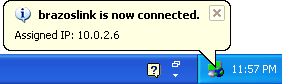
A progress window should appear, and in a few seconds you should see a message telling you that openvpn is now connected:
Mac OS X: Open your home folder, and select the Library folder (there is also a Library folder at the base level of the hard drive; you don't want that one--you want the one in your home folder).
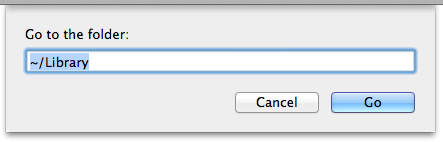
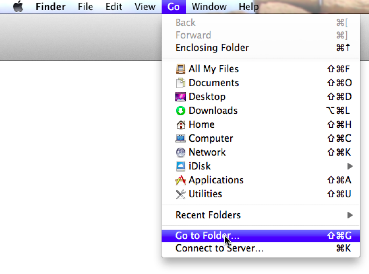
Note for Mac OS X 10.7 (Lion) users: By default, the Library folder in your home folder is hidden. To open it, click the Go menu in the Finder, select Go to Folder..., and enter ~/Library in the box:
Drag the openvpn folder from your desktop into the Library folder:

Open Tunnelblick: 
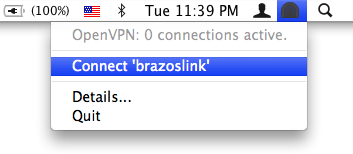
Tunnelblick places a VPN control menu in the top right-hand corner of the menubar, just to the left of the Spotlight icon. Click the control menu, and select Connect 'brazoslink':
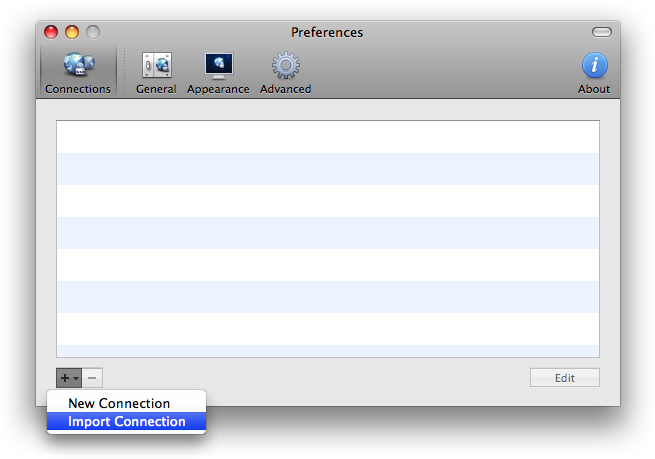
Or, open Viscosity: 
Open the Viscosity preferences:
Click the + (plus) button at the bottom left of the Preferences window, and select Import Connection:
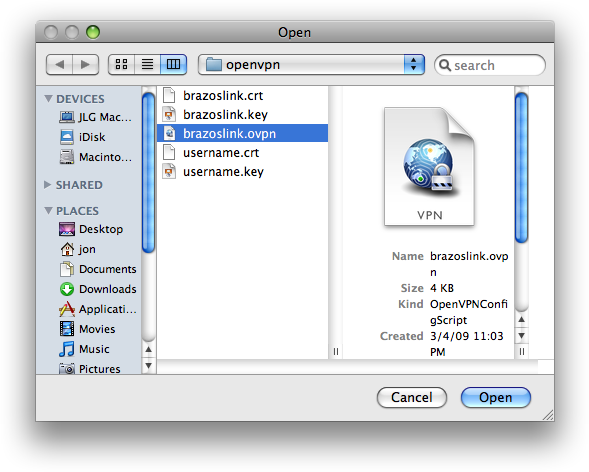
Navigate to your ~/Library/openvpn folder and select the brazoslink.ovpn file:
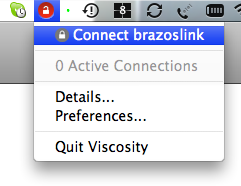
Once the new configuration is there, you should be able to select Connect brazoslink from the Viscosity menu:
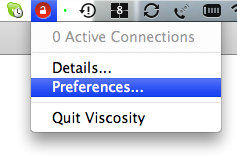
NOTE: By default, Viscosity may not route your internet traffic through the VPN tunnel, even when it is connected. To check this, select Preferences... from the Viscosity menu:
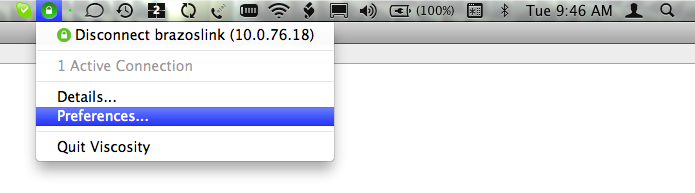
In the Preferences window, select the Networking tab, and be sure the Send all traffic over VPN connection option is checked:

iOS: Copy the openvpn folder to your iOS device (by connecting it to your computer, using iCloud Drive, via email, etc.).
Locate the openvpn folder on your device, and open the "brazoslink.ovpn" file using OpenVPN Connect.
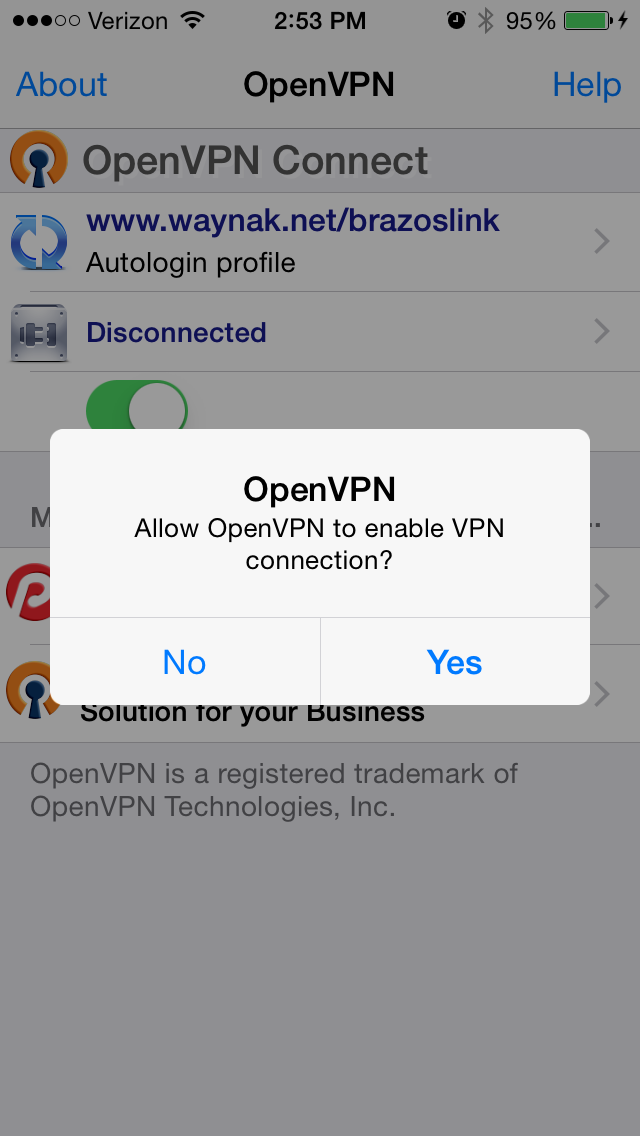
In the OpenVPN Connect app, be sure the brazoslink VPN config appears. Click the green plus (+) to connect. You may have to "Allow OpenVPN to enable VPN connection," to enable it to connect:


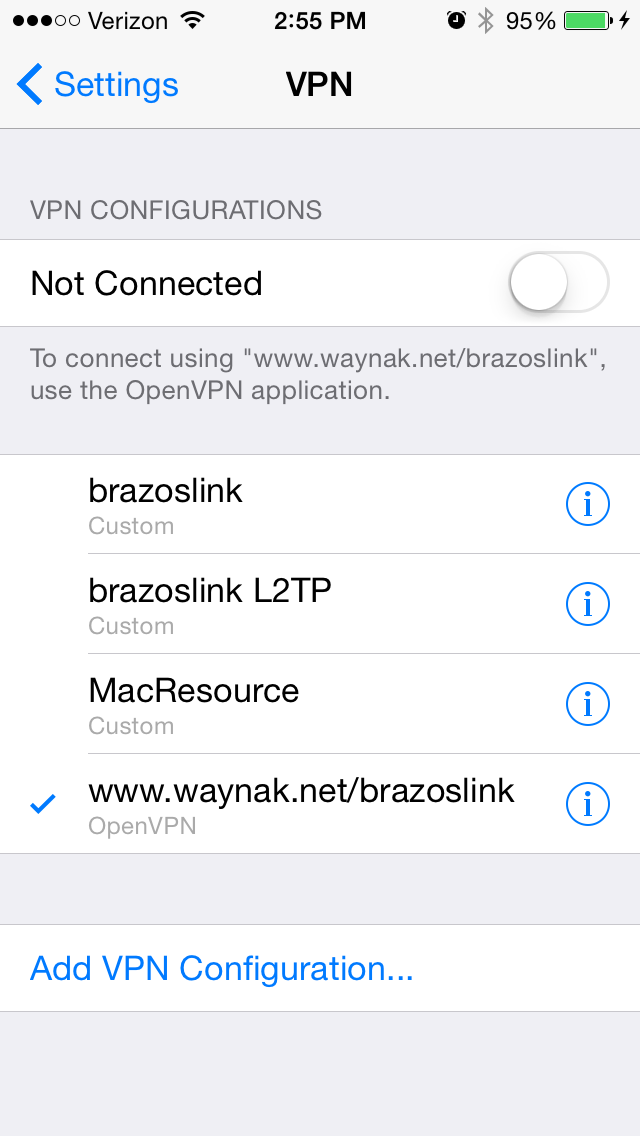
The brazoslink VPN config should also now appear in Settings-->VPN as a connection option. You can connect/disconnect from this screen or from within the OpenVPN app itself: